So lately I've been involved on a lot more Hardware and IoT hacking than usual. Among the most interesting tools I got recently was the awesomely named "Bus Pirate". It is a tool intended to help debug and communicate with hardware (via JTAG, SPI, I2C, UART, etc.) This short tutorial will show you how to lift the firmware from a TP-Link WR841N router using the Bus Pirate.
* Recently revived my old Twitter account. Follow me for more hacking content!
Follow @konukoii
Opening the WR841N Router
We will need physical access to the EEPROM chip inside the router. This chip is a reprogramable memory that contains the firmware (software) that controls the router's usage. In a lot of cases, you will find that these firmware contain small versions of linux running web servers (the router website that greets you when you travel to 192.168.0.1) and other programs needed for your router to work properly. In other words, your router is just a small linux box.
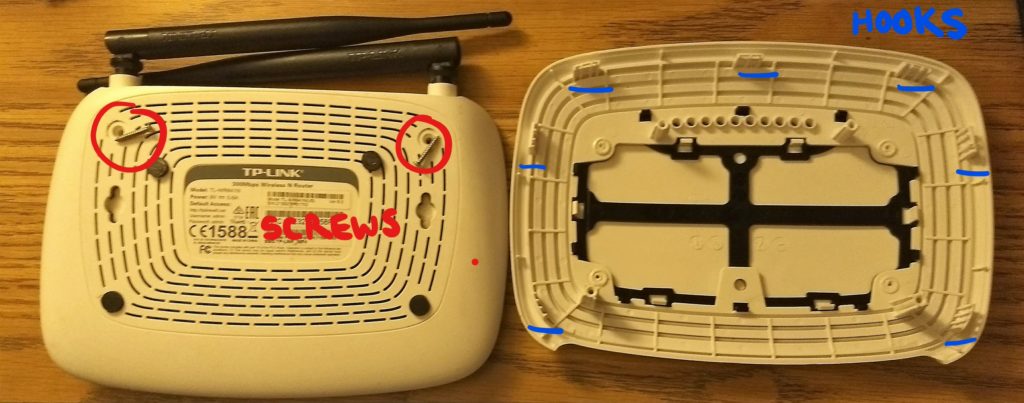
In this specific router model you will want to peel the two upper black plastic peg (closer to the antenna) to uncover two screws. Once you have unscrewed these, you can use a small knife or wedge to separate the top and bottom half of the router's casing.
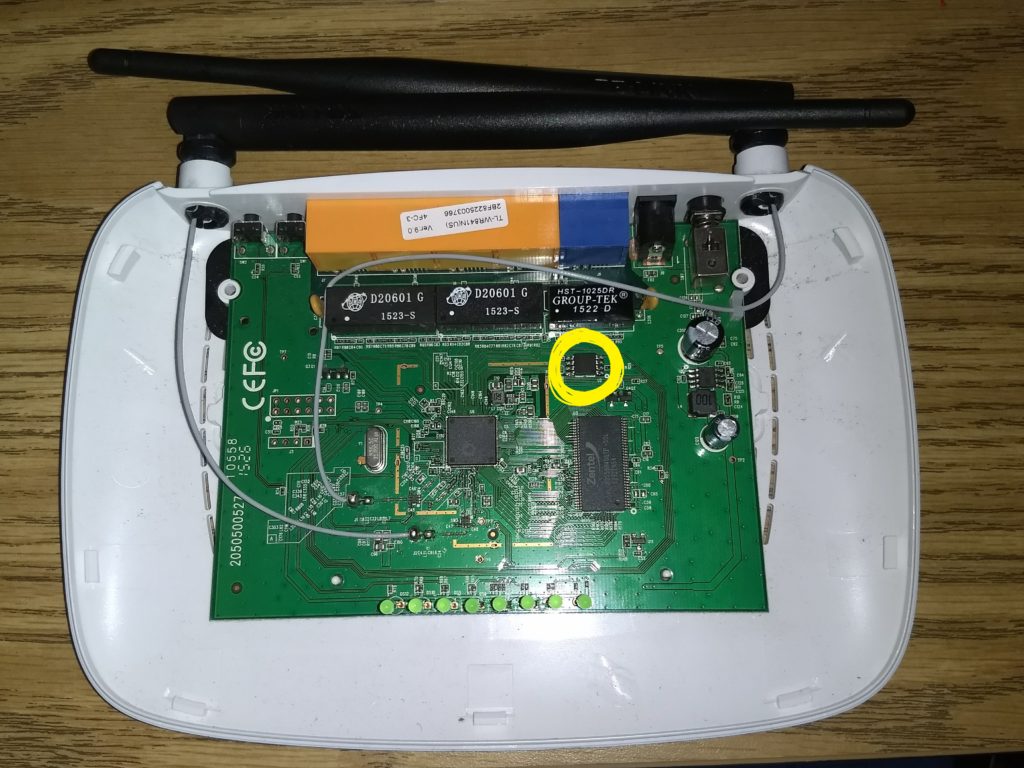
Once you open it up, you will find the EEPROM chip on the top right corner. If you have any doubts on which is the chip you can always google the labels the chip has. Since these are all off-the-shelf parts, you can quickly find datasheets online detailing their purpose and usage.
Connecting the Bus Pirate
The first thing we need to find out is the pin-out for this specific EEPROM. If you look at the chip closely you will see it is labeled "Winbond 25Q32FVS1G 1518". We can quickly google the datasheet for this chip (link) and we find the following diagram:

You are looking to connect the EEPROM to the Bus Pirate as so:
| Bus Pirate | Flash Chip | Description |
| CS | #1 CS | Chip Select |
| MISO | #2 DO (IO1) | Master In, Slave Out |
| 3V3 | #3 WP (IO2) | Write Protect |
| GND | #4 GND | Ground |
| MOSI | #5 DI (IO0) | Master Out, Slave In |
| CLK | #6 CLK | The SPI Clock |
| 3V3 | #7 HOLD (IO3) | Hold |
| 3V3 | #8 VCC | Supply |
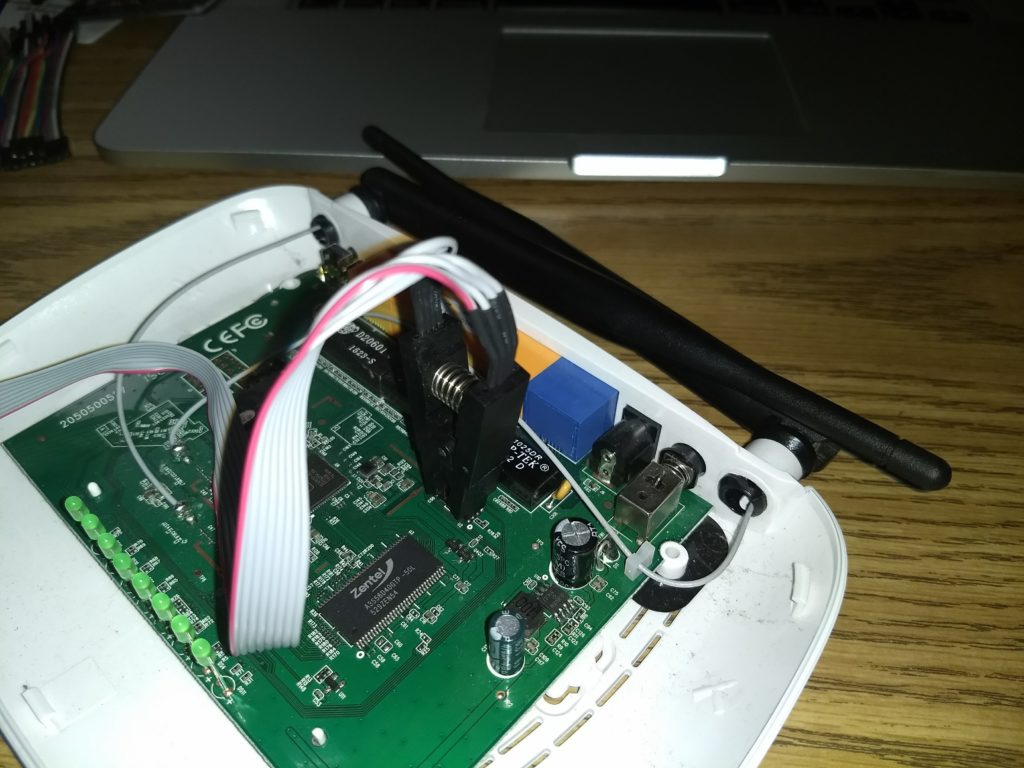
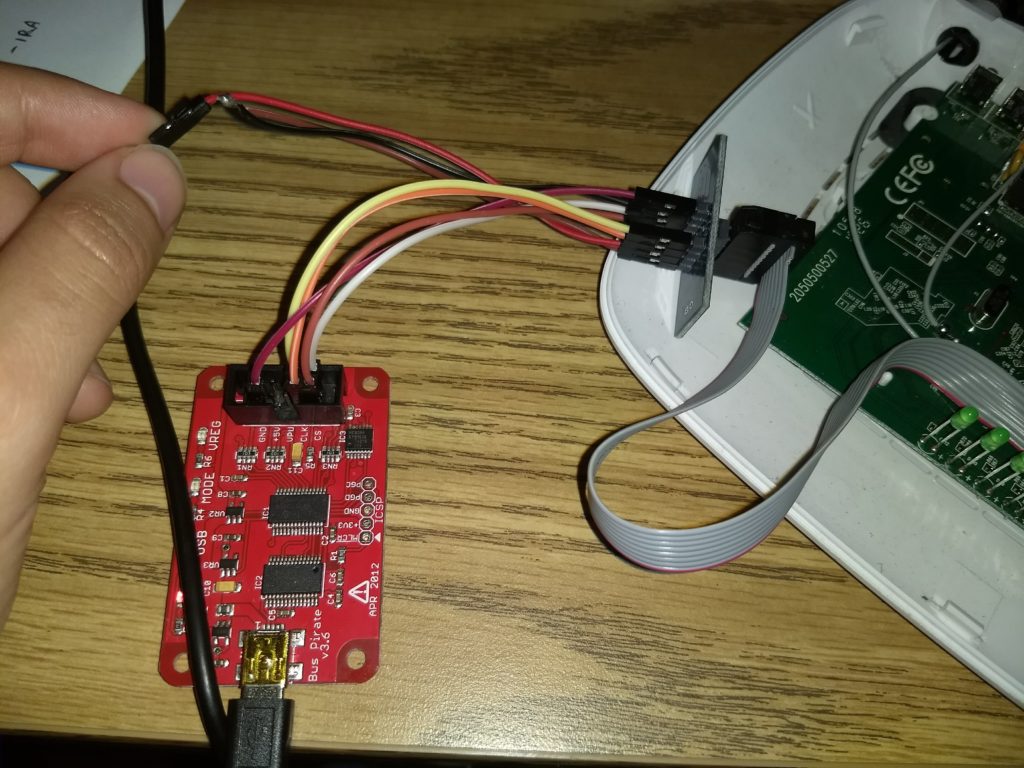
The following tricky part is figuring out where to connect what. What I like doing is clipping the SPI Clip to the EEPROM and using the Breakout board on the other end. Then I connect each pin to the corresponding pin on the Bus Pirate. If you are having problems figuring out which line is which consider doing a continuity test with a multimeter.
Here are some images to better explain my setup and how I figured each cable to be connected. Use the picture below to trace each line and find which one you are connecting where. Usually I try to use line #1 (the read line) to be the /CS line (The leg next to the little circle on the chip). Just go slow and make sure you are connecting each line to the proper place.
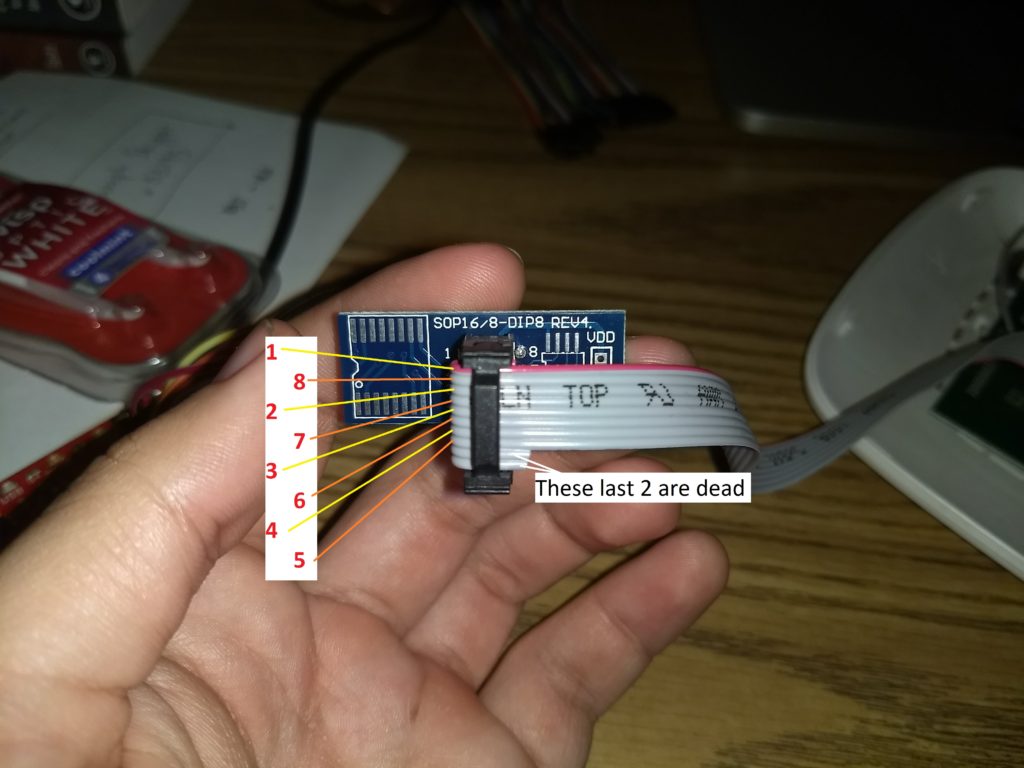
Notice that the 3,7,8 pins need to be hooked up to the 3v3 port. I soldered up three cables together as so:
Believe it or not, you are done with the hardest part!
Lifting the Firmware
Warnings:
- For whatever reason I couldn't get the Bus Pirate to work well when using it from a Virtual Machine (VBox), as it would hang during reading. I ended up brew installing flashrom.
- Don't connect the router to power. The BusPirate will provide the power.
- Since I used mac the location of the buspirate was /dev/tty.usbserial-A904055E, but in Linux this would be /dev/ttyUSB0. This could change depending on your system, just check /dev/ or lsusb for an idea of what it might be called.
At this point you should be able to run:
$ flashrom -p buspirate_spi:dev=/dev/tty.usbserial-A904055E
This should automatically find and display the chip name. Ultimately, this didn't work for me so instead I ran:
$ flashrom -L
... snip ...
Winbond W25Q40.V PREW 512 SPI
Winbond W25Q80.V PREW 1024 SPI
Winbond W25Q16.V PREW 2048 SPI
Winbond W25Q32.V PREW 4096 SPI
Winbond W25Q64.V PREW 8192 SPI
Winbond W25Q128.V PREW 16384 SPI
... snip ...
This listed all the possible chips that the bus pirate can communicate with. In the list I quickly saw the W25Q32.V, which is the one we are messing with. Now when I ran the following code I could actually see the chip had been found!
$ flashrom -p buspirate_spi:dev=/dev/tty.usbserial-A904055E -c W25Q32.V
flashrom v0.9.9-r1955 on Darwin 17.2.0 (x86_64)
flashrom is free software, get the source code at https://flashrom.org

Calibrating delay loop... OK.
Bus Pirate firmware 6.1 and older does not support SPI speeds above 2 MHz. Limiting speed to 2 MHz.
It is recommended to upgrade to firmware 6.2 or newer.
Found Winbond flash chip "W25Q32.V" (4096 kB, SPI) on buspirate_spi.

No operations were specified.
Lastly to dump the firmware I simply ran the following command. It took a while to actually read all the firmware so feel free to go do something in the meantime:
$ flashrom -p buspirate_spi:dev=/dev/tty.usbserial-A904O66E -c W25Q32.V -r firm.bin
flashrom v0.9.9-r1955 on Darwin 17.2.0 (x86_64)
flashrom is free software, get the source code at https://flashrom.org

Calibrating delay loop... OK.
Bus Pirate firmware 6.1 and older does not support SPI speeds above 2 MHz. Limiting speed to 2 MHz.
It is recommended to upgrade to firmware 6.2 or newer.
Found Winbond flash chip "W25Q32.V" (4096 kB, SPI) on buspirate_spi.

Reading flash... Done.
Now you should see firm.bin on your working directory!
Analyzing the Firmware
You can use a tool called binwalk (which you can apt-get on Linux or brew install on OSX) to automatically extract the firmware.
$ binwalk -e firmware.bin
You will now find a folder called _firmware.bin.extracted with a small linux filesystem inside. Feel free to poke around!

Moving Forward...
This is only a very brief dip into hardware hacking. Extracting the firmware from a devices is simply the first step. Afterwards we can start looking for secret keys, passwords, api keys, etc. We could also potentially modify the firmware with a backdoor and the re-install the firmware into the device. I'll come back and post more on these subjects soon, but for now I hope this has been a helpful tutorial and, as always, feel free to contact me with any questions, comments or concerns. Keep on hacking!
Cool post! I'm going to try this myself with my own bus pirate. Great blog! Keep up with the cool posts!