So lately I've been diving in deep on the security world. I just started working an R&D/pen-testing job and started research at a Crypto lab. I've learned all sorts of fun and interesting things that I'd love to share with all of you. Before I go into detail about some of those things, I think it would be best if I help you set-up your own 'hacking' lab. This tutorial shouldn't take you more than 10 minutes (excluding program download times). So let's jump right into it!
Step 1 : Download and Install Virtualbox
- Virtualbox is a software that allows you to emulate a computer. Think of it as a computer inside a computer. Neat, huh? This is going to help us install two computer inside your machine (A victim computer, and an attacker computer). We do this because we can better control the environment and give you space to learn without messing up your computer.
- Head on over to www.virtualbox.org and get the version that works for your system. As a side note, you can also use VMWare, but this tutorial follows the assumption that you are using VirtualBox.
Step 2 : Download and create a Kali VM
- In case you haven't heard of it before, Kali is an amazing Linux distro that comes with a bunch of pen-testing and hacking tools. This is the beast that we will be using to break into other computers!
- Visit our awesome friends at www.kali.org and get the Kali that works for you (32bit/64bit).
- Open Virtualbox and hit the New button
- In options choose Type: Linux, Version: Debian (32 or 64 depending on what you are installing), Memory Size: 1024

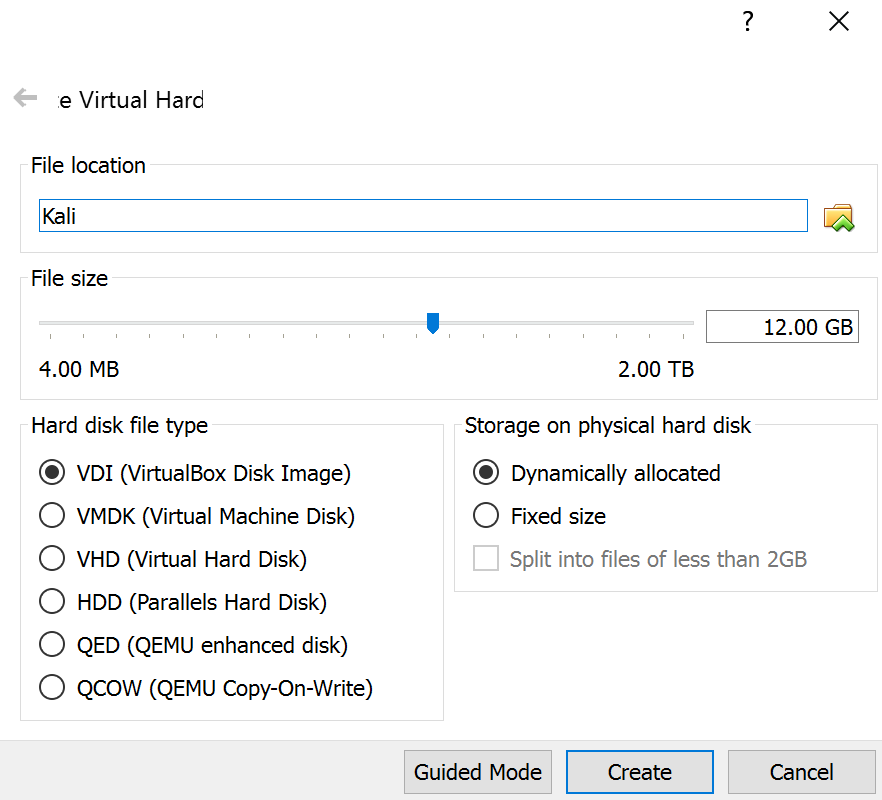
- Hit create and on the next screen, give Kali at the very least 9.00 GB. You can leave everything else as is.
- Then fire up the program by clicking Start and when it asks to insert a CD select your downloaded Kali.iso (sometimes what you downloaded is a .tar or some other compressed file. You can use 7zip to decompress.)
Step 3: Download and create a Kioptix
- As you might imagine, if Kali is your attack machine, Kioptix is going to be your vulnerable machine.
- Follow the same steps you did for Kali, except this time choose Type: Other, Version: Other, Memory Size: 512 (honestly Kioptix barely takes any toll on your system so you can probably get away with less), HDD: 3.00 GB (potentially even less)
Step 4: Setting up an Virtualbox internal network
- Now that you have your two machines you must setup the internal network that will connect both of them. Thankfully, VirtualBox has an integrated DHCP client that will emulate a network amongst your Virtual Machines.
- Find the directory where VirtualBox is installed (Default: C:\Program Files\Oracle\VirtualBox) and open a commandline here (you can just shift right-click and select "Open command window here")
- Run the following command:
VBoxManage dhcpserver add -netname Testnet -ip 192.168.75.100 -netmask 255.255.255.0 -lowerip 192.168.75.101 -upperip 192.168.75.150 -enable
- For the pros:
- -netname [name] : sets the name of the network
- -ip [ip] : sets the base ip for your network
- -netmask [netmask]: you guessed it, this is the netmask
- -lowerip: lowest ip assigned to any VM
- -upperip: highest ip assigned to any VM
- -enable: turns on this dhcp server
- For the pros:
- Now on both the Kali and Kioptix machine select Settings > Network and set Adapter 1 to "Internal Network" and Name: Testnet (or whatever name you gave your network).
- Optional: If you want Kali to have access to internet too. You can setup another adapter to NAT. You might need to do more tweaking tho, cause now you have two different networks and you don't want to be accidentally pen-testing on the wrong one.

Step 5: Testing that everything worked out fine
- Now you can run both your VMs.
- Kioptix will automatically grab an IP.
- Kali on the other hand is flaky so to force it to grab an IP, you open the commandline and use
dhclient eth0
(Note: you might have something different than eth0, so you can check running ifconfig)
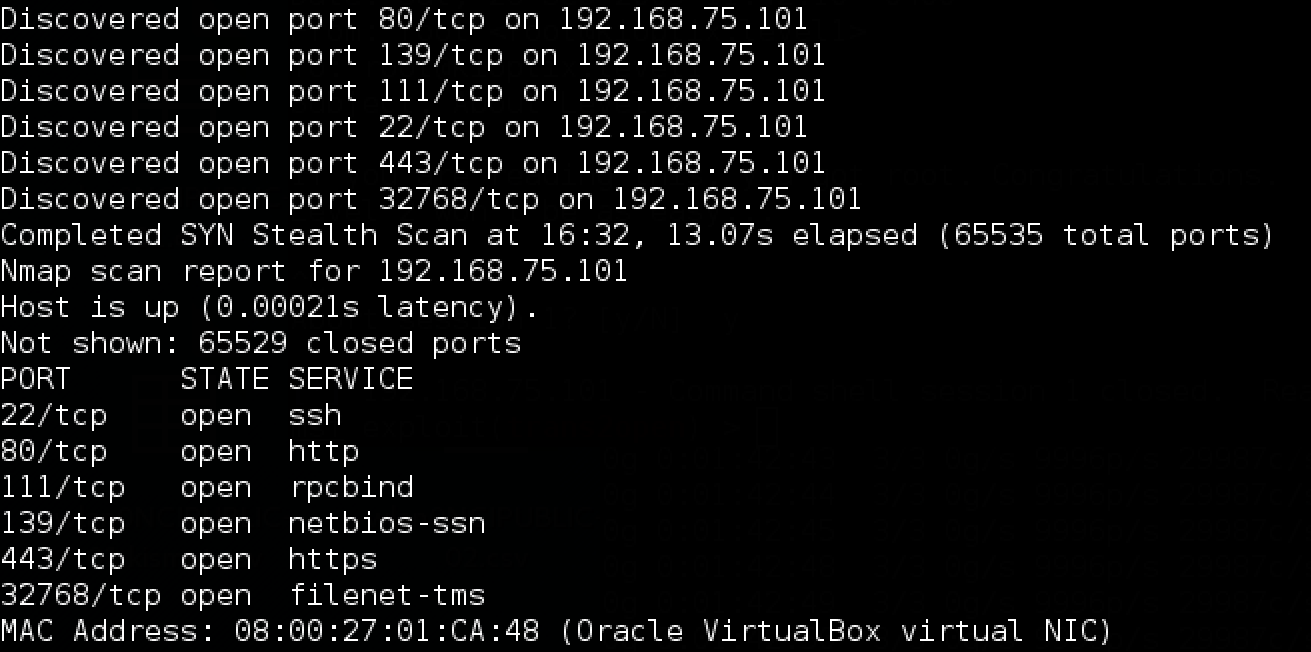
- Last but not least, just to check that everything is correct, let's try running a quick portscan:
nmap -f -n -P0 -v -p- -T4 192.168.75.0/24
. You should see a machine with some open ports (22,80,111,139,443).
Congratulations! You are now done, and you have just set up a perfect environment to learn some pen-testing. 🙂
Stay tuned because, later I will show you some basic pen-testing techniques, and we will actually break into that Kioptix machine!
Recent Comments